

This free printable funeral program template serves as a poignant and practical tool to honor and commemorate the life of a loved one.

A funeral program typically includes essential details such as the order of service, biographical information about the deceased, readings and any other presentations of note. This template contains space for you to add any/all of these details. This free printable funeral program template assists in organising funeral proceedings from the comfort of home, where you can edit, make mistakes, have a cry, and come back to it. It’s stressful enough to lose someone you love, let alone when you’re on the spot with the task of dictating a service to commemorate their whole life.
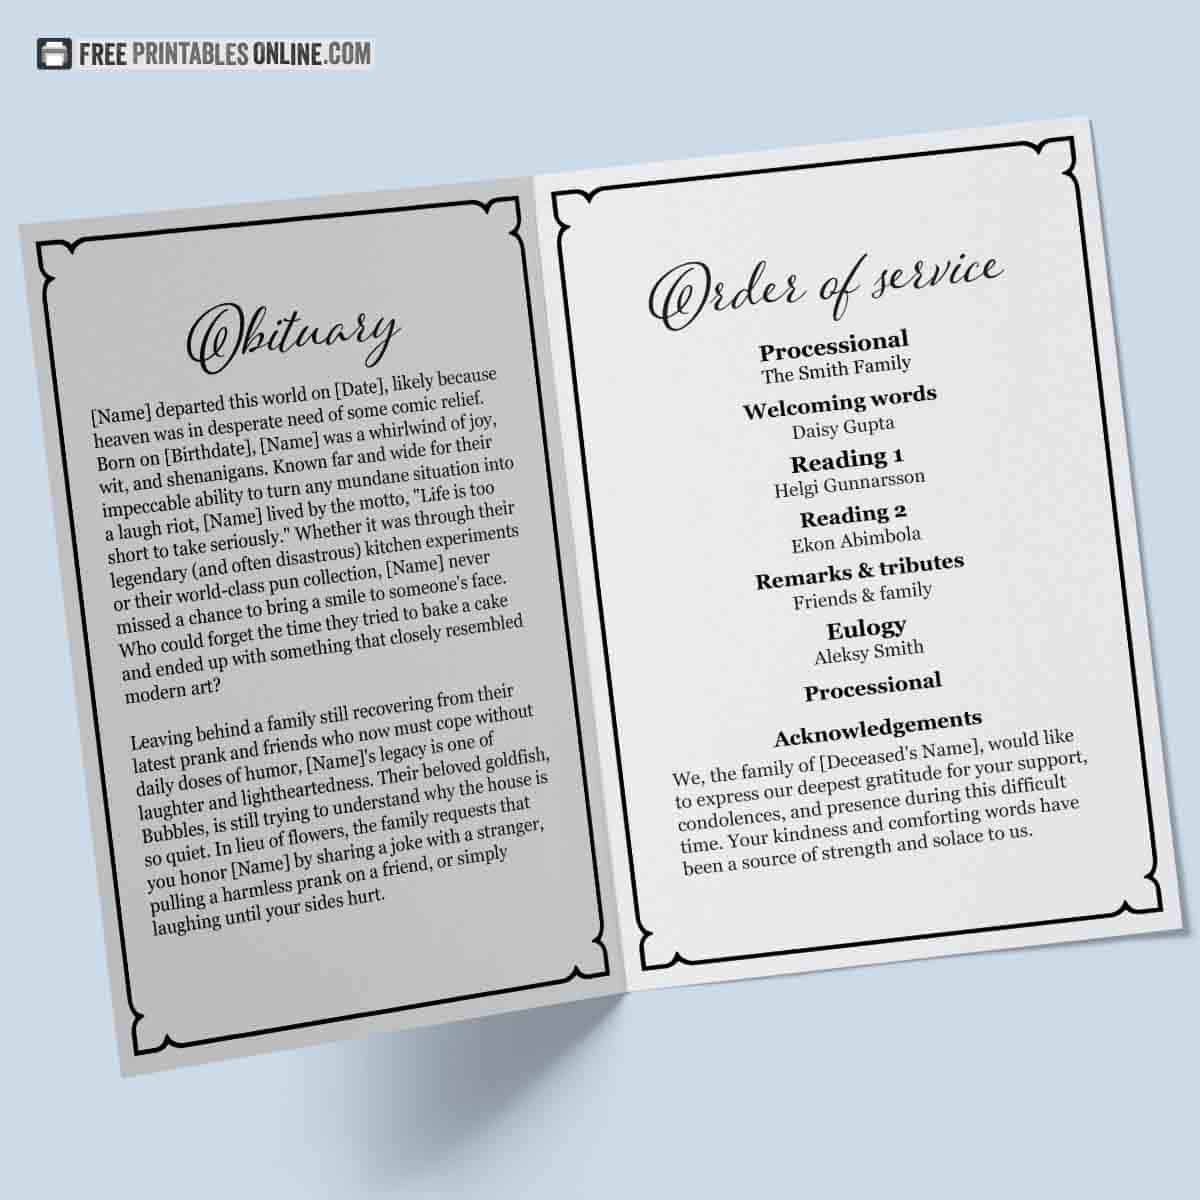
This printable funeral program not only assists in organizing the funeral proceedings but also becomes a keepsake for mourners to cherish and remember the departed. The text and photo can be customized to reflect the individual’s personality, incorporating meaningful quotes and/or writings that capture the essence of their personality, life and legacy. By providing a structured format, this funeral program offers a sense of comfort and guidance during a difficult time, allowing family and friends to focus on honoring and celebrating the life of their loved one.
This funeral program template can be customised with both an image of your loved one and information about the service. The only text that cannot be edited is the handwritten “in loving memory” at the top of page 1, “obituary” on page 2, and “order of service” on page 3.
This printable funeral program template differs from most other free printables on this site in that it must be printed as a booklet.
Step-by-Step Guide to Printing a Booklet in Adobe Reader
A booklet arranges two pages per sheet of paper. Once you collate, fold, staple (if necessary) the double sides printed sheets, you’ll have a booklet with all of the pages in the correct order. Here’s how:
- Open the PDF in Adobe Reader:
- Launch Adobe Reader.
- Open the PDF file you want to print as a booklet by clicking
File>Openand selecting the file.
- Open the Print Dialog:
- Click
File>Printto open the print dialog box.
- Click
- Select Booklet Printing:
- In the Print dialog box, look for the option labeled
Booklet(under Print Sizing & Handling) and select it.
- In the Print dialog box, look for the option labeled
- Configure Booklet Options:
- Booklet Subset: Choose between:
Both sides: If your printer supports automatic duplex printing (in other words, it will suck the paper back in and print both sides).Front side onlyorBack side only: If you need to manually reinsert the pages to print on both sides.
- Binding: Select left.
- Booklet Subset: Choose between:
- Print:
- Once everything is configured, click
Printto start printing your booklet. - If your printer does not support automatic duplex printing, you will need to follow the on-screen instructions to manually reinsert the pages.
- Once everything is configured, click
Tips & troubleshooting for successful booklet printing at home
- Paper Size: Make sure the paper size in the print settings matches the paper loaded in your printer.
- Preview: Use the print preview to ensure that the pages will print correctly.
- Test Print: Consider printing a test booklet with a few pages to ensure that everything is set up correctly before printing the entire document.
- If your text displays correctly on screen but does not print then click on the “advanced” button and select print as image on the next screen.
By following these steps, you should be able to print a professional-looking booklet using Adobe Reader.
This template also includes space for an image (on the first page, below “in loving memory of,” which can seem daunting with PDF files, but if you follow the instructions below you should have no problems. The image for this program should be as close to 345 x 175 pixels in dimension as possible.
How to add images and photos to a pdf document
The first method applies only if you have a paid Adobe subscription, in which case you can directly access this feature in Adobe Acrobat Pro. However, if you do not have an Adobe subscription and use the free version of Adobe Reader, you cannot edit documents and therefore cannot add photos. This means you need to use another method to add images to your PDF file.
The second method is to use another PDF reader that will allow you to add photos. I recommend docfly.com. You can use DocFly up to three times per month without a subscription to edit PDF files. After you upload and edit your PDF file, click the save button. After you click save, an export button will appear. Click “export” and then “download” to save your newly edited PDF back to your computer.
